Pages

Tuesday, May 12, 2009

Eco- Crafts of the Week

From this week forward I will be posting one Eco-friendly craft each week. Each craft will have a connection to water quality. This week's eco-craft will be creating a pet food scoop. To make a pet food scoop you will need the following:

  • plastic laundry bottle
  • felt in your favorite shades
  • white craft glue
  • scissors or a sharp knife
  • felt alapabet stickers (optional)

So gather up these materials and check back tomorrow for a step-by-step pictorial of how to create a pet food scoop and how it relates to water quality at your home!

Monday, May 11, 2009

Mother's Day Crafts

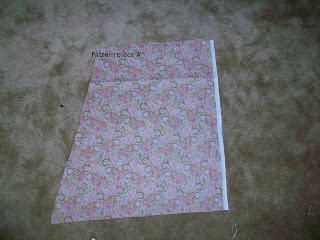
On Friday I told all of you I planned to create a few crafts this weekend. Well that didn't go as well as I had planned. I got part a skirt cut out and began piecing together however I don't think I read the directions correctly or something as the skirt is not turning out as I had planned. I did make some felt picture frames over the weekend as mother's day gifts from my husband's mom and grandmother. But I didn't get the wall hanging even started. I am only work part of a day today so maybe after some housecleaning I can get started on those as well. Below you will find some pictures from this weekends crafts...


Recycled Crayons


This is a picture of the molds we were using to create our crayons. These molds are candy molds but you could use candle or clay molds as well.


After attempting the microwave we moved the melting to the stove. This didn't work as well as I had hope. My next attempt will be in the oven.


We melted the crayons in a double boiler set-up. Just to let you know if you try this it takes forever.


After melting the crayons as best I could we placed the wax in the mold on ice. This was to make it harden faster. Again the end result was not the quality I would have liked to see. I'll let you know how my next attempt goes.


My first attempt at creating recycled crayons did not go so well. I had a hard time getting the crayons to melt and the end result was not the quality I wanted. I plan to try my hand at this again in the very near future. Here are some of the pictures from my first attempt.

Friday, May 8, 2009

Mother's Day

I have many plans for this weekend. The first is to sleep late however I also want to do something special for all the mom's in my Sunday school class. I considered doing a small coaster or wall hanging for each but I don't think I have enough time. So I think I am going to do a fabric bookmark. Using the scraps for various projects I plan to make each person a book mark and a handmade card. I will post the instructions on Monday along with pictures!

Here is a quick and cheap idea to give to all of your moms. Using Windows Movie Maker I made a short movie of my son to give to my mom who lives about 5 hours away. The movie includes titles, sayings, and music. It took me about an hour to create this keepsake. I plan to make another one for Wyatt as a keepsake. Maybe an ongoing movie...year by year?

I am hoping that I can keep busy this weekend crafting and cleaning. I will try Monday to post all the pictures of my completed projects! Happy Mother's Day!

Tuesday, April 28, 2009

Earth Week

As an environmental educator...Earth Week kicked my butt! I did 12 presentations at 3 schools last week, a workshop for adults, an awards reception, and two public events (one that had over 2,000 people attend!). Needless to say I was worn out. I felt like a terrible mom because I didn't have enough time to really play with my little one. I was constantly doing something. I neglected my house and my yard (both which need lots of TLC). I was glad to have the opportunity to share our message with people but I am happy now for a slower time.

Since things have been a little crazy I haven't really done much crafting. I have however spent some time reflecting on God's word. On Monday the 13th we had our monthly women in the church meeting (WIC). We are reading a book by Jerry Bridges called "Trusting God." This is a very powerful book that really has opened my eyes to all of God's kindness and grace. This is a book I really suggest reading if you have a chance. I ended up missing the majority of our Missions Conference because of work however my family and I did pledge to pray for one of our missionaries in Belize. I hope to send them a note this week.

We also pledge our faith promise. A faith promise is an amount of money above and beyond your normal giving to the church. It helps fund missions throughout the world. This is not an amount that you can comfortably give in addition this is an amount that you are not sure how you will give it but pray and God will provide. I am hoping to help instill these values in our son.

My next sewing craft project will be another pillowcase dress for a friend's daughter. I also plan on making something for myself within the next few weeks. I haven't decided if I want to make a dress or a skirt. I have a few options on this. Depending on how the first skirt turns out I might make a skirt for my friend to match her daughter's dress....um great Mother's Day gift for friends and family. I hope to start on these projects this week.

I have lots of ideas for kid's crafts as well. I will be doing most of these at work in preparation for summer activities. Keep checking back for instructions on how to make rain sticks, turtle crayons, nature t-shirts, and muck more.

Friday, April 10, 2009

Pillowcase Dress

Ok so I made my son's Easter outfit and vowed that even though it about beat me I would sew another outfit. I had told my sister-in-law that I would make my niece something, so....

Last night about 7 I was looking through patterns and could not fathom creating another outfit this weekend, especially not a dress with gathers or pleats. I put down the patterns and went online. I had seen a little girl in the store with a darling little dress and thought that it might be simple to make but I didn't know what it was called. As always when I go online I was sidetracked by checking emails and postings on my favorite websites. Thanks York County Mommies....without a posting from them I would have never found the pillowcase dress. This simple easy dress was completed in a matter of two and a half hours which part of was contenting with a toddler that really wanted to help.

Here is how to make a pillowcase dress....easy peasy!


If you have a pillowcase that you think is cute or you just want to try go right ahead and use it, if not you can use a piece of fabric that is 36- 40 inches long.

Beginning with fabric
Step 1. fold it in half, right sides together, and stitch up one side.
Step 2. Hem the bottom.

*Move on to step 2 below "beginning with a pillowcase"

Beginning with a pillowcase
Step 1: Cut the pillowcase off, leaving the hemmed end,
Step 2: Now that you have your fabric ready to start measure the desired length using the chart below

6 months - 14 1/4"
12 months - 16 1/4"
18 months - 17 1/4"
2T - 18 1/4"
3T - 19 1/4"
4T - 20 1/4"

Step 3. Then cut a strip from the leftover pillowcase (or fabric) that is 1 1/2" tall.

Step 4. Cut the strip open and then in half, so you have two strips, 1 1/2" tall by about 20" long.

Step 5: Cut out an armhole on each side. (to make this easier I folded the pillowcase in half and cut one armhole so that they would be exactly the same). Use the following measurements:

sizes 2T and below cut 1.5" in and 3" down
sizes 3T and 4T cut 2" in and 4" down

Step 6: Take the 1 1/2" strip and place it on the inside of the armhole, right side of strip to wrong side of dress. Fold down the top of the strip about 1/2". Meet the top of the fold with the top of the dress. Stitch the strip all the way around the armhole (from top front of dress, down armhole, to the top back of the dress). When you get close to the end of the armhole, stop and cut off the extra strip, leaving enough to fold down 1/2". Fold down the 1/2 and finish off the armhole.

Step 7: Fold the strip twice, once so that the raw edge is touching the raw edge of the armhole

Step 8: Fold that piece over to the other side of the armhole, binding the armhole.

Step 9: Fold like that along the entire armhole, pinning as you go. You could also iron.

Step 10: Stitch along the binding. Don't worry about trying to stitch the outside and inside perfectly, I would just concentrate on the outside. The inside is already stitched and it won't show anyway Do the same to the other arm.

Step 11: Fold the top of the front and back, first 1/4" then 5/8" to form a casing with no raw edges showing. Stitch this closed.

Step 12: Thread 1 yd of ribbon through each casing.

Step 13: Tie small knots in the end of the ribbons, gather the front and back, and tie bows on the shoulders.

Now you have constructed a pillowcase dress. I did not make these instructions up on my own. I modified instructions from http://www.andersonsplace.net/sewing/pillow_case_dress.htm. This site also has great pictures to go along with the instructions. Below are some pictures of my finished dress.


I really enjoyed making this dress, it was simple to create and cute as can be. I plan to make more in the future. If we ever have a little girl this may be all she wears! Enjoy!

Easter Outfit

OK so after searching the Internet for HOURS trying to find my son an Easter outfit that was traditional and cheap I decided that it would be cheaper to make one. This is the first official pattern I completed! Usually I start on one and then quit or I just make it as I go without any patterns. That only works on square pieces.

I started on this project about March 30th. I cut out the pattern and the fabric. About two days later I got the lining for the romper cut out. Finally after a week I got the pieces pin together in what I thought was the correct order. I began sewing seams soon after that, but Wyatt had other plans. I tried working on it on and off throughout the night but Wyatt was amazed at the sewing machine and I was concerned about him getting hurt. Finally after William got home and the two of them got to bed I focused on constructing the outfit.

I began by sewing the lining and the fabric right sides together. I left an opening in the leg so I could flip the piece right side out. This was easy enough to accomplish rather quickly. Once I had all the pieces lined and flipped I began pinning the pieces together. I really thought I was following the pattern correctly. I stitched up the seams and pieced the outfit together. I didn't realize until I was trying to finish up the legs that something major was wrong with this outfit. The legs wouldn't go together! I could not figure out to make leg holes without sewing the piece all the way shut! I was getting mad. The seam ripper went to work QUICK! I read the instructions again and again, pinned sections all kind of ways and then realized that I was trying to piece together the WRONG sections of the outfit. After this realization I corrected my mistakes and had the outfit finished in about 30 minutes, including buttons. This was really an accomplishment for me since I am a little challenged as a seamstress.

This outfit taught me a lot about patience and determination, both which rank high on my list of characteristics that need to be cultivated in a person. Even though I had a hard time creating this outfit I plan to make more for Wyatt. My next project is a dress for my niece, not sure how that will go but stay tune to find out....


Linked up @
Homespun Momma